Table of Contents
Channel Reference (in progress)
Controls
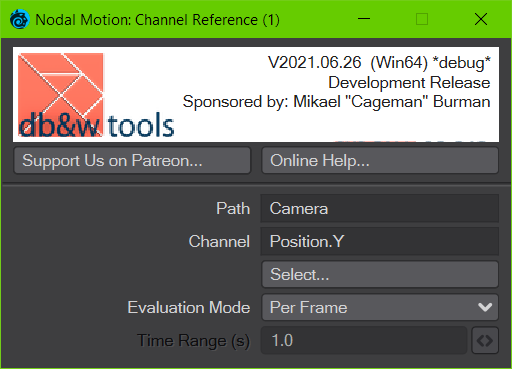
Path / Channel
Read only text controls that show the path and name of the currently referenced channel.
Select...
This opens a new panel with a control1) to select a channel.
If the channel is part of a vector (this is determined by the last part of the channel name, i.e. .X/.Y/.Z, HPB or RGB), the output vector of the node will make the triplet of values available.
Evaluation Mode
This mode is identical to the one used by the Variables (Angle, Colour, Distance, Percentage, Position, Rotation, Scalar, Scale) nodes.
This controls how the channels are evaluated:
- Per Frame
The value will be retrieved once per (sub-)frame - Interpolated
This will retrieve the value for the current and next frame and interpolate between them in the case of motion blur - Per Sample
This fully evaluate the channel every time and may be quite slow
You can use the output of the node to, for example, change the position of a texture and have that change in position be motion blurred.
Interpolated is the preferred method to use, Per Sample should only be used if the result of Interpolated isn't accurate enough.
The node also has a Time input and a corresponding Time Range control.
If the Time input is connected, the Time Range control will be available and the evaluation modes will be disabled. In this mode, the scalar connected to the Time input will be used directly as a current time when evaluating an enveloped Value of the node.
The Time Range control determines which range of the envelope is equivalent to a range of 0..1 of the Time input scalar. I.e. if the Time Range is 4.0 (s), in a 30fps scene, then a range of 0..1 on the Time input will be equivalent to 0..120 frames on the envelope.
This allows you to use any enveloped value as a gradient, by connecting the Time input to something that would normally drive a gradient.
Outputs
There is a scalar and a vector output. Both will change their name depending on the selected channel. They will keep the existing connections though.
 This is the plugin of the month for June 2021, made possible by the finest patrons on Patreon.
Sponsored by Mikael “Cageman” Burman.
